by H.R. D’Costa, @scribesworld
Oh, no.
You just took a look at your outline or draft.
It’s definitely too short.
Or, in a different scenario, it’s long enough.
But, unfortunately, it’s rather bland. It lacks texture and variety.
Who are you gonna call to fix it?
Not the Ghostbusters.
Not a developmental editor. (Save that for a more dire writing emergency.)
Because, you see, you can fix this easily on your own.
All you need to do is to weave a subplot (or two) alongside your main plot.
Your page count will expand, and at the same time, your story will become more textured.
This three-part series on subplots will help you get there. Here’s a quick overview:
- In Part 1, we covered 5 uses for subplots. (Definitely read this if you’re struggling to come up with content for your subplot.)
- In Part 2, we covered how to structure your subplot—plus the golden rule to follow regarding subplots.
- In Part 3, we’ll cover how to weave subplots into your story as well as conduct a subplot “safety check.” (You’re reading Part 3 right now.)
Note: These subplot tips have been adapted from my writing guide Sparkling Story Drafts, which will help you write cleaner rough drafts, reduce your revision time, and get a crazy-good story onto the marketplace—faster. To learn how you could win a paperback copy, see the end of this post.
And now let’s get to today’s tips (served a la mode or not, your choice*)…
3 Approaches to Incorporating Subplots into Your Story
All right. You’ve figured out the content of your subplot.
You’ve also figured out three plot points (or beats) for your subplot. Remember, three is the bare minimum. Your subplot is probably going to require more than that.
Finally, you’ve followed the golden rule regarding subplots: you’ve created an intersection between your subplot and the main plot.
Now that you know how the two connect, what’s left?
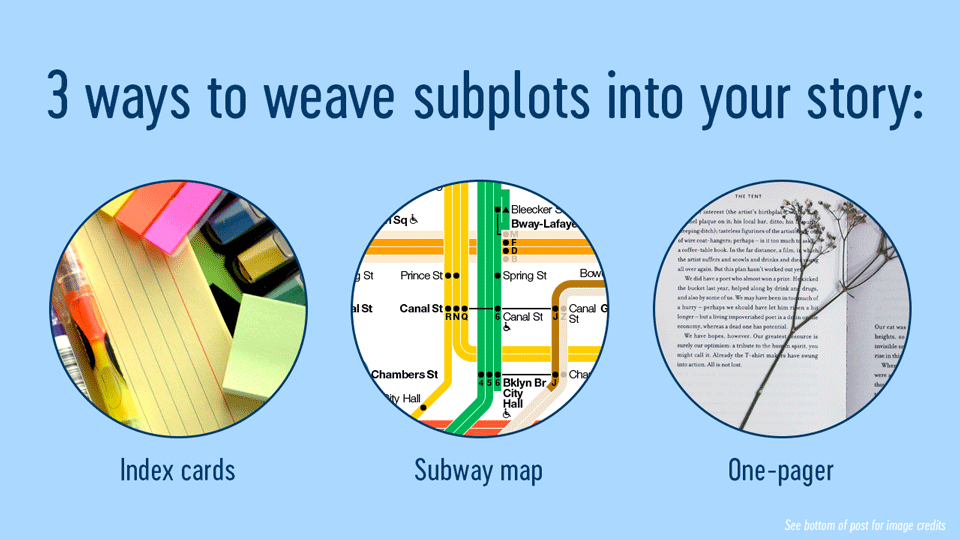
Just one more thing: incorporating your subplot into your story. There are different approaches you can take. Here are three that might be helpful for you.
Use color-coded index cards. Basically, you write out all the plot points of your story (main plot + subplots) on index cards (one plot point per card).
But you’ll use different colored cards for your subplot to track its flow. (If you only have white index cards, you can achieve the same effect by marking subplot index cards with sticky notes. Or, you could use a different colored pen to mark the plot points for the subplot.)
I love index cards because they’re tactile and flexible. So this is the method I use. But there are others…
Create a subplot subway map. Here, you map out the beats of your subplot like they’re stops on a subway line. When you do this, the intersection between your subplot and the main plot might look like a major transportation hub!
I learned about this method from Gabriela Pereira of diyMFA.com. For a full explanation that uses The Hunger Games as an example, click here. (A sample subplot map is included.)
Sketch out your subplot on one page. This method comes courtesy of our very own blog host, Elizabeth Spann Craig. Sometimes, she’ll write out a subplot as if it’s “a short story with its own little arcs of plot or character development.”
After that, she’ll splice up the subplot and weave those pieces into her draft. (If you’re a pantser, this approach might work best for you.) For more details, read this.
Pointers on How to Distribute Your Subplot Material
As you’re weaving your subplot into your story (using index cards, etc.), you might wonder how to space out your subplot material.
How long should you focus on the main plot, before taking a break to explore a subplot?
Here are two rules of thumb:
- When you’ve lingered so long in your main plot that it’s starting to feel monotonous, that’s a good time to branch out into a subplot.
- Cut away to a subplot when doing so increases the tension. (For an example, watch Silence of the Lambs. Study when the film cuts away to the subplot involving the senator’s kidnapped daughter.)
For more tips, read author Elizabeth Sims’s article on this topic. She provides seven options for weaving subplots into the main plot.
Option #1 is the “isolated chunk.” Essentially, you stuff the content of your subplot into a single chunk of your story (perhaps a chapter).
I just wanted to offer a quick word of caution about this option. Now, it can work. Look at the subplot involving Murron that’s compressed into the first act of Braveheart. Also, as Sims observes, the isolated chunk is used to good effect in The Adventures of Huckleberry Finn.
But if you use this option, you incur a major risk. Your story might feel episodic.
Maybe, like Mark Twain, you’re okay with that. If not, slice your isolated chunk into smaller pieces, and use one of the approaches described above to weave these pieces into your story.
Time for a Subplot “Safety Check”
No matter which approach to incorporation you choose, there are a few things to look out for when you’re reviewing your subplot in your outline or rough draft. Think of this as a subplot “safety check.”
For each of your subplots, ask yourself these three questions:
- Does my subplot intersect with the main plot?
- Has my subplot taken over the main plot? (Remember the subplot is supposed to be subordinate to the main plot!)
- Have I resolved this subplot?
Let’s dwell on that last item for a second. Sometimes, you’ll forget to resolve a subplot because you’ve lost track of your plot threads.
But in other cases, forgetting to resolve a subplot can indicate a deeper problem: you have mixed views on the content of your subplot. For example, your subplot may espouse a theme you might not agree with.
Make sure to address this source of ambivalence before you send your story out into the world.
* * *
There you have it. We’ve reached the end of this “easy as pie” guide to subplots. Now you know what purposes (besides as a stall tactic) subplots can be used for, how to structure your subplot, and how to incorporate it into your story.
To get a 1-page subplot worksheet that’ll help you keep tabs of all of these details (including the subplot “safety check” questions), sign up here.
I hope this guide helps you develop your subplots in such a way that readers will not only devour your story but, having finished it, draw one conclusion…
YUM!
* For the record, I’m all for the a la mode :)
Win a Paperback Copy of Sparkling Story Drafts
Three different opportunities to win—here’s opportunity #3!
For every post in this series, you have a chance to win a paperback copy of Sparkling Story Drafts ($24.99), which will help you write cleaner rough drafts, reduce your revision time, and get a crazy-good story onto the marketplace—faster.

For a chance to win today, answer this question in the comments: Besides subplots, what plotting or craft issue is frustrating you the most right now (e.g. getting your story started, making your protagonist likeable, etc.)?
Elizabeth will randomly select a winner from the comments by Wednesday, January 23.
Note: This giveaway is only open to residents of North America, South America, Europe, and the UK.
Good luck and happy writing!
Author Bio

A graduate of Brown University, H. R. D’Costa (a.k.a. HRD) almost became a lawyer. Twice. But then she realized that although she wanted to be a lawyer, she needed to be a writer. So she dedicated herself to studying films, screenplays, and novels in order to understand why some stories were gripping…while others were easy to walk away from.
Ultimately, she shared her discoveries in eight writing guides, including Sizzling Story Outlines: How to Outline Your Screenplay or Novel, Always Know “What Happens Next,” and Finish Your Rough Draft Without Freaking Out and Story Stakes: Your #1 Writing Skills Strategy to Produce a Page-Turner that Transforms Readers into Raving Fans of Your Screenplay or Novel , which one Amazon reviewer described as “a must-have in your top 10 books on writing.”
For practical, actionable writing tips designed to help you keep readers glued to your pages, visit her website scribemeetsworld.com, which is also home to the Ultimate Story Structure Worksheet (downloaded over 37,000 times by writers from around the world). Get it here.
Lattice-style pie by Dilyara Garifullina; Book with sprig by Florencia Viadana
Index cards by Kevin Wen; Subway map by Ray Weitzenberg; both licensed via CC by 2.0
3 Ways to Weave Subplots Into Your Story from @scribesworld + giveaway: Click To Tweet


All of these are good ideas. I’ve been enjoying this series – lots to think about here!
Thanks for your kind words, Margot. I appreciate it!
Weaving it in like a subway map is an excellent idea.
I don’t know how I found Gabriela’s article (it very well could’ve been thanks to Elizabeth!)…but when I did, I thought it was gold.
Very good ideas! I’m learning to be more of a plotter so these ideas are great. Thanks
I’m so glad these tips have been helpful for you, Jemi.
I’m a plotter myself, and I really enjoy it—especially all the time saved during revisions. I hope plotting in advance is as enjoyable for you, too :)
I’ve really enjoyed this series and have passed it along on FB, too. Thanks for all the great tips!
Thanks, Heather!
Thanks so much for sharing this series with your fans! I’m glad you’ve enjoyed it.
I think for me, the hardest part is getting the fill space between meet, black moment, and end. What are they doing? I am still learning to figure my characters out too. They don’t talk to me and I fear they come across like paper dolls, waiting for me to tell them what to do. :(
I would LOVE to win a copy of this, thank you for the chance.
This was very helpful. Thank you!
Cutting text! Once you start and finish, you have to cut so much text and self edit. That’s the most painful part — looking at your work and deciding what isn’t good enough based on your critical audience.